Polytunnel growing
Theme: Cheers Theme – Gary Portnoy
Introduction
Winter 2020/21 – there was an outbreak of Avian flu and all domestic fowl had to be housed in areas that prevented them from mixing with wild birds. At that time our polytunnel was our only suitable space. So goodbye winter salads and hello chicken poo!
I took the results of the amazing the work the chickens did in clearing the space to properly design how I used my polytunnel.
The polytunnel is a 3 x 6m Keder Polytunnel. Installed over 10 years ago and designed to withstand the brutal winds we get.
Ethics
Earth Care – No Dig, Use own compost, Organic
People Care – Growing food and herbs that my family wants
Future Care – Share surplus with friends and neighbours, use perennial plants or plans that self seed, use saved water, save and share seed
Principles used to guide design
Holmgrens 12 Principles
Design Framework – Web of Principles
Using the 12 principles as a framework to guide the design
Client
Myself – a personal project
Dates
April 2021 – April 2022
Tools Used
Scale of Permanence, Desire Lines, Decision Matrix, Needs/Elements/Characteristics, Random Assembly, Sowing logs, overlays & moveable templates
Resources Used
- Web of Principles notes – Tomas Remiarz
- https://www.permaculturewomen.com/scale-of-permanence/
- Imagination
- Vegetables and Herbs for the Greenhouse and Polytunnel – Klaus Laitenberger
- The Polytunnel Handbook – Andy McKee & Mark Gatter
- How to Grow Winter Vegetables – Charles Dowding
- Real Seeds Website
- https://www.chrisbowers.co.uk/article/complete-guide-to-dwarf–miniature-fruit-trees/
Yields this project will provide and links to Personal Objectives
- A diploma design
- A new framework to play with
- Year round harvest
- A better use of my polytunnel space
- Tie in my learning to practical designs for the farm
- Gain practical skills
- Become fluent in the use and application of design tools and Permaculture principles
- Become confident enough to demonstrate and explain to others how Permaculture can be applied to both land non-land based projects
1. Creatively Use and Respond to Change

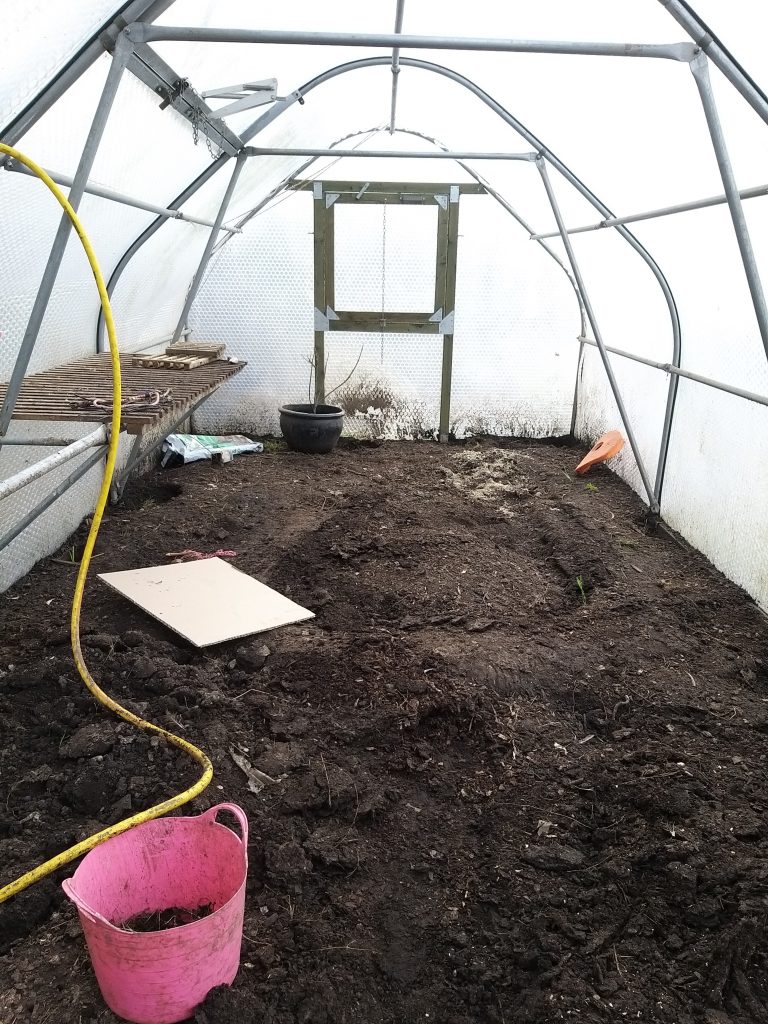
The chickens did what chickens do and completely scratched up the growing areas and pathways that had been in place for a number of years.
What this destruction gave me was a chance to redesign how I used the space inside my polytunnel.
2. Catch and Store Energy

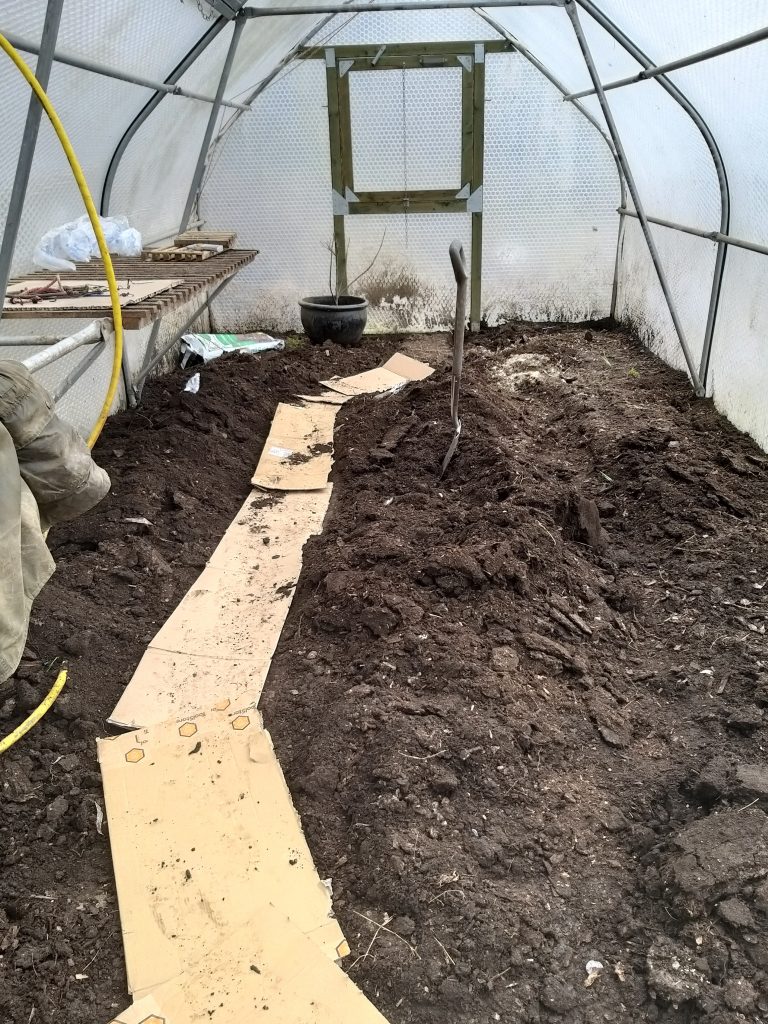
As soon as the birds had been moved out in the spring, I took the opportunity to redesign the space.
I walked the tunnel several times, visualising the space with things growing in it. I walked; I reached; I observed where my feet had been and how I moved through the tunnel. I took note of anything that restricted my movement.
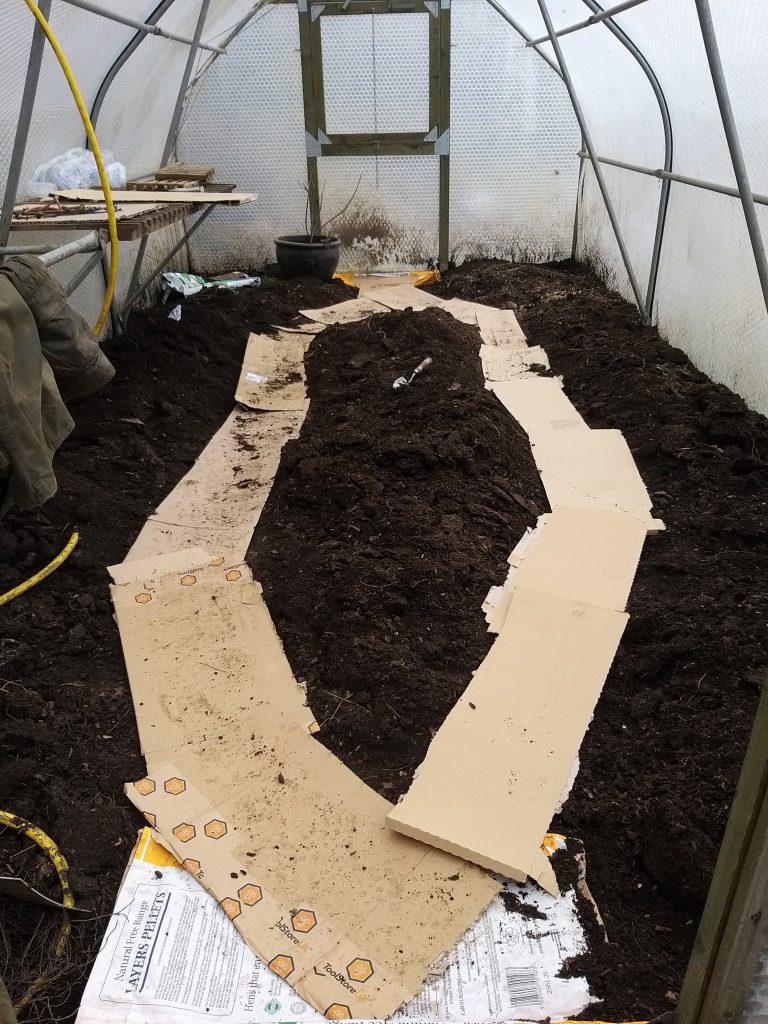
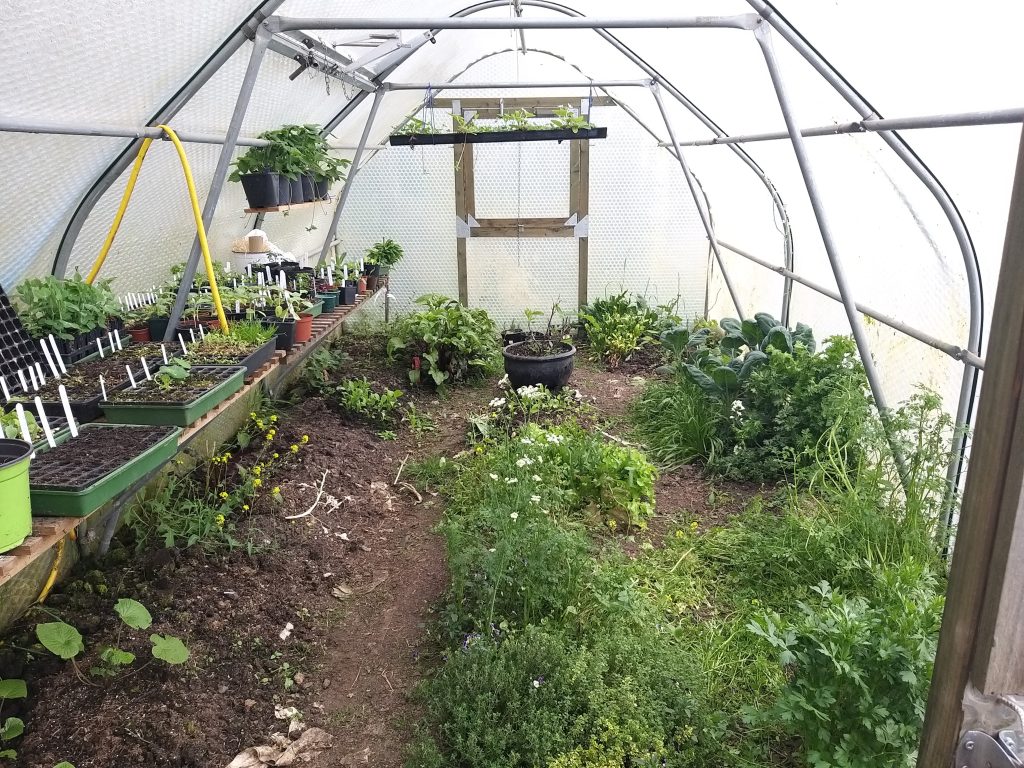
I had created Desire Lines! These desire lines became my new paths. The paths defined the growing areas.
3 – Pattern to Detail

Having used the polytunnel for a number of years, I was familiar with which areas were sunniest. and had observed that the edges of the polytunnel were wetter than the central areas as condensation runs down the skin.
I needed to understand how the new beds created out of my flow through the tunnel would fit with what I knew. I needed to make sure I was making no incorrect assumptions.
I considered Scale of Permanence as defined by Dave Jacke to determine what I had and what I needed.
| Have | Need/Want Identified | |
|---|---|---|
| Climate | South(ish) facing. Receives sun from late morning. Sheltered from all but Westerly winds. Temperatures can drop below freezing | Extra Protection for Tender Plants |
| Landform | Set into a steeply wooded bank Left hand side holds water during wetter months | Keep nettles and undergrowth away from polytunnel to maximise light and minimise pests |
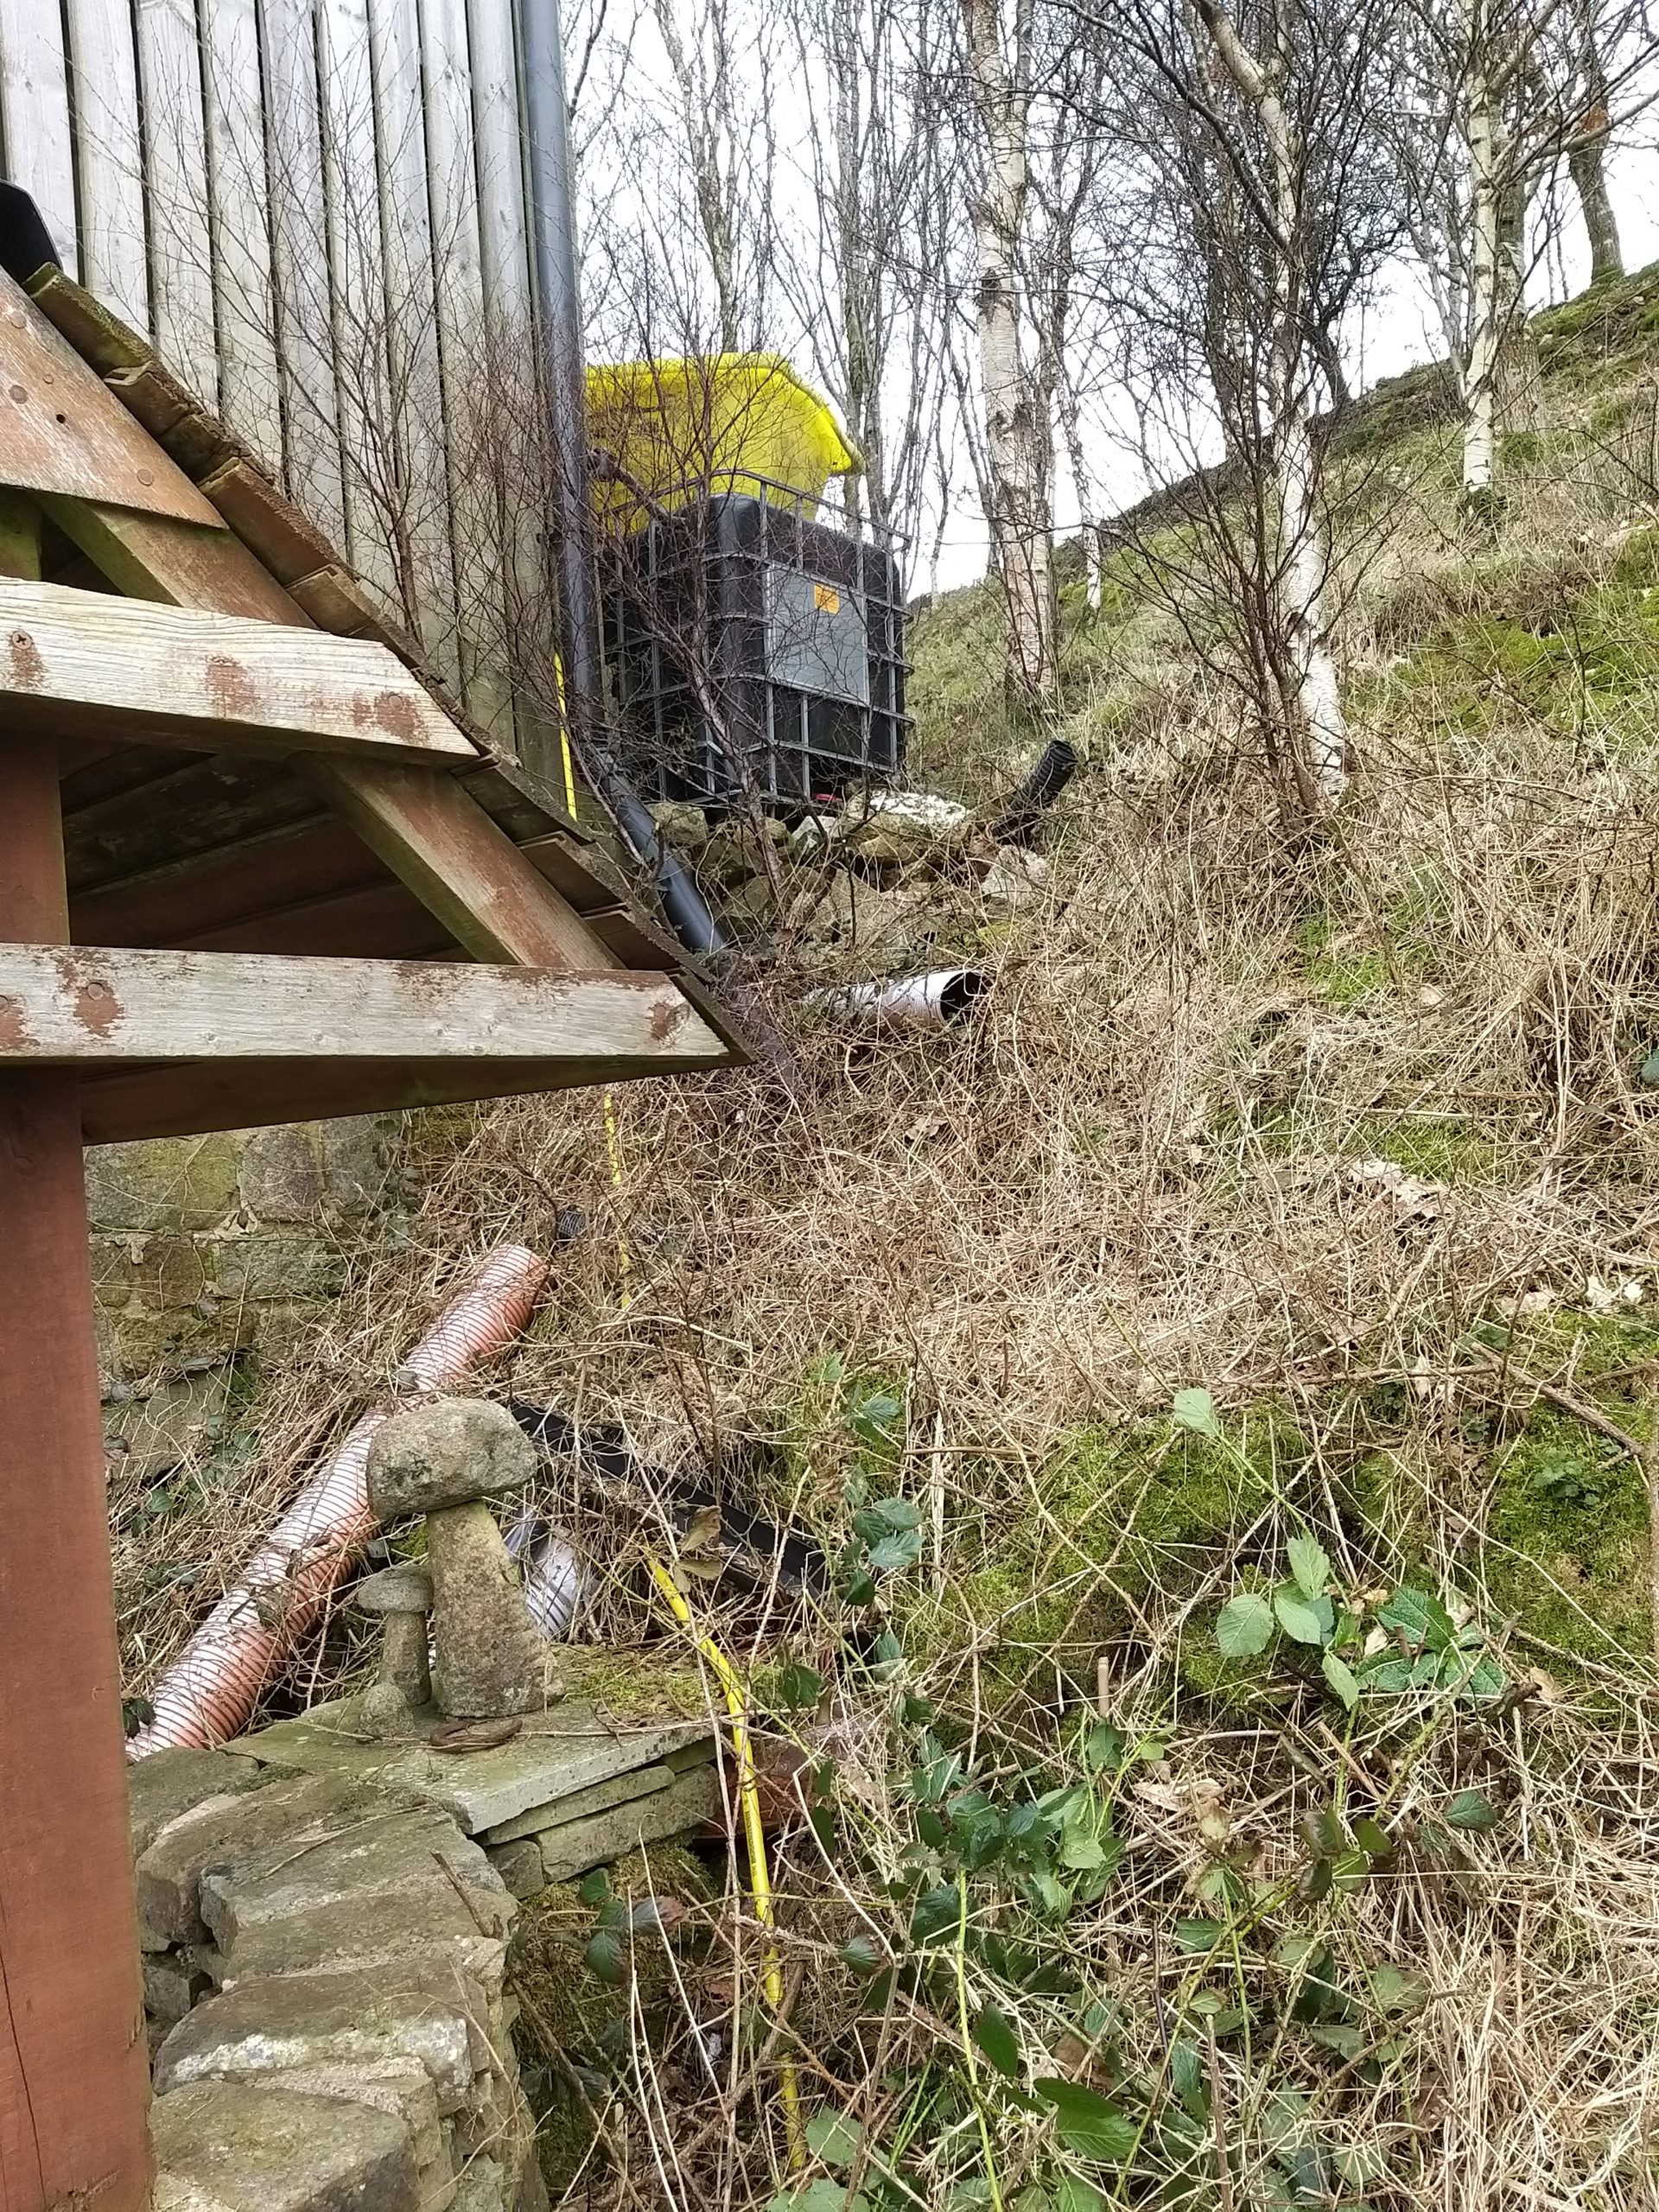
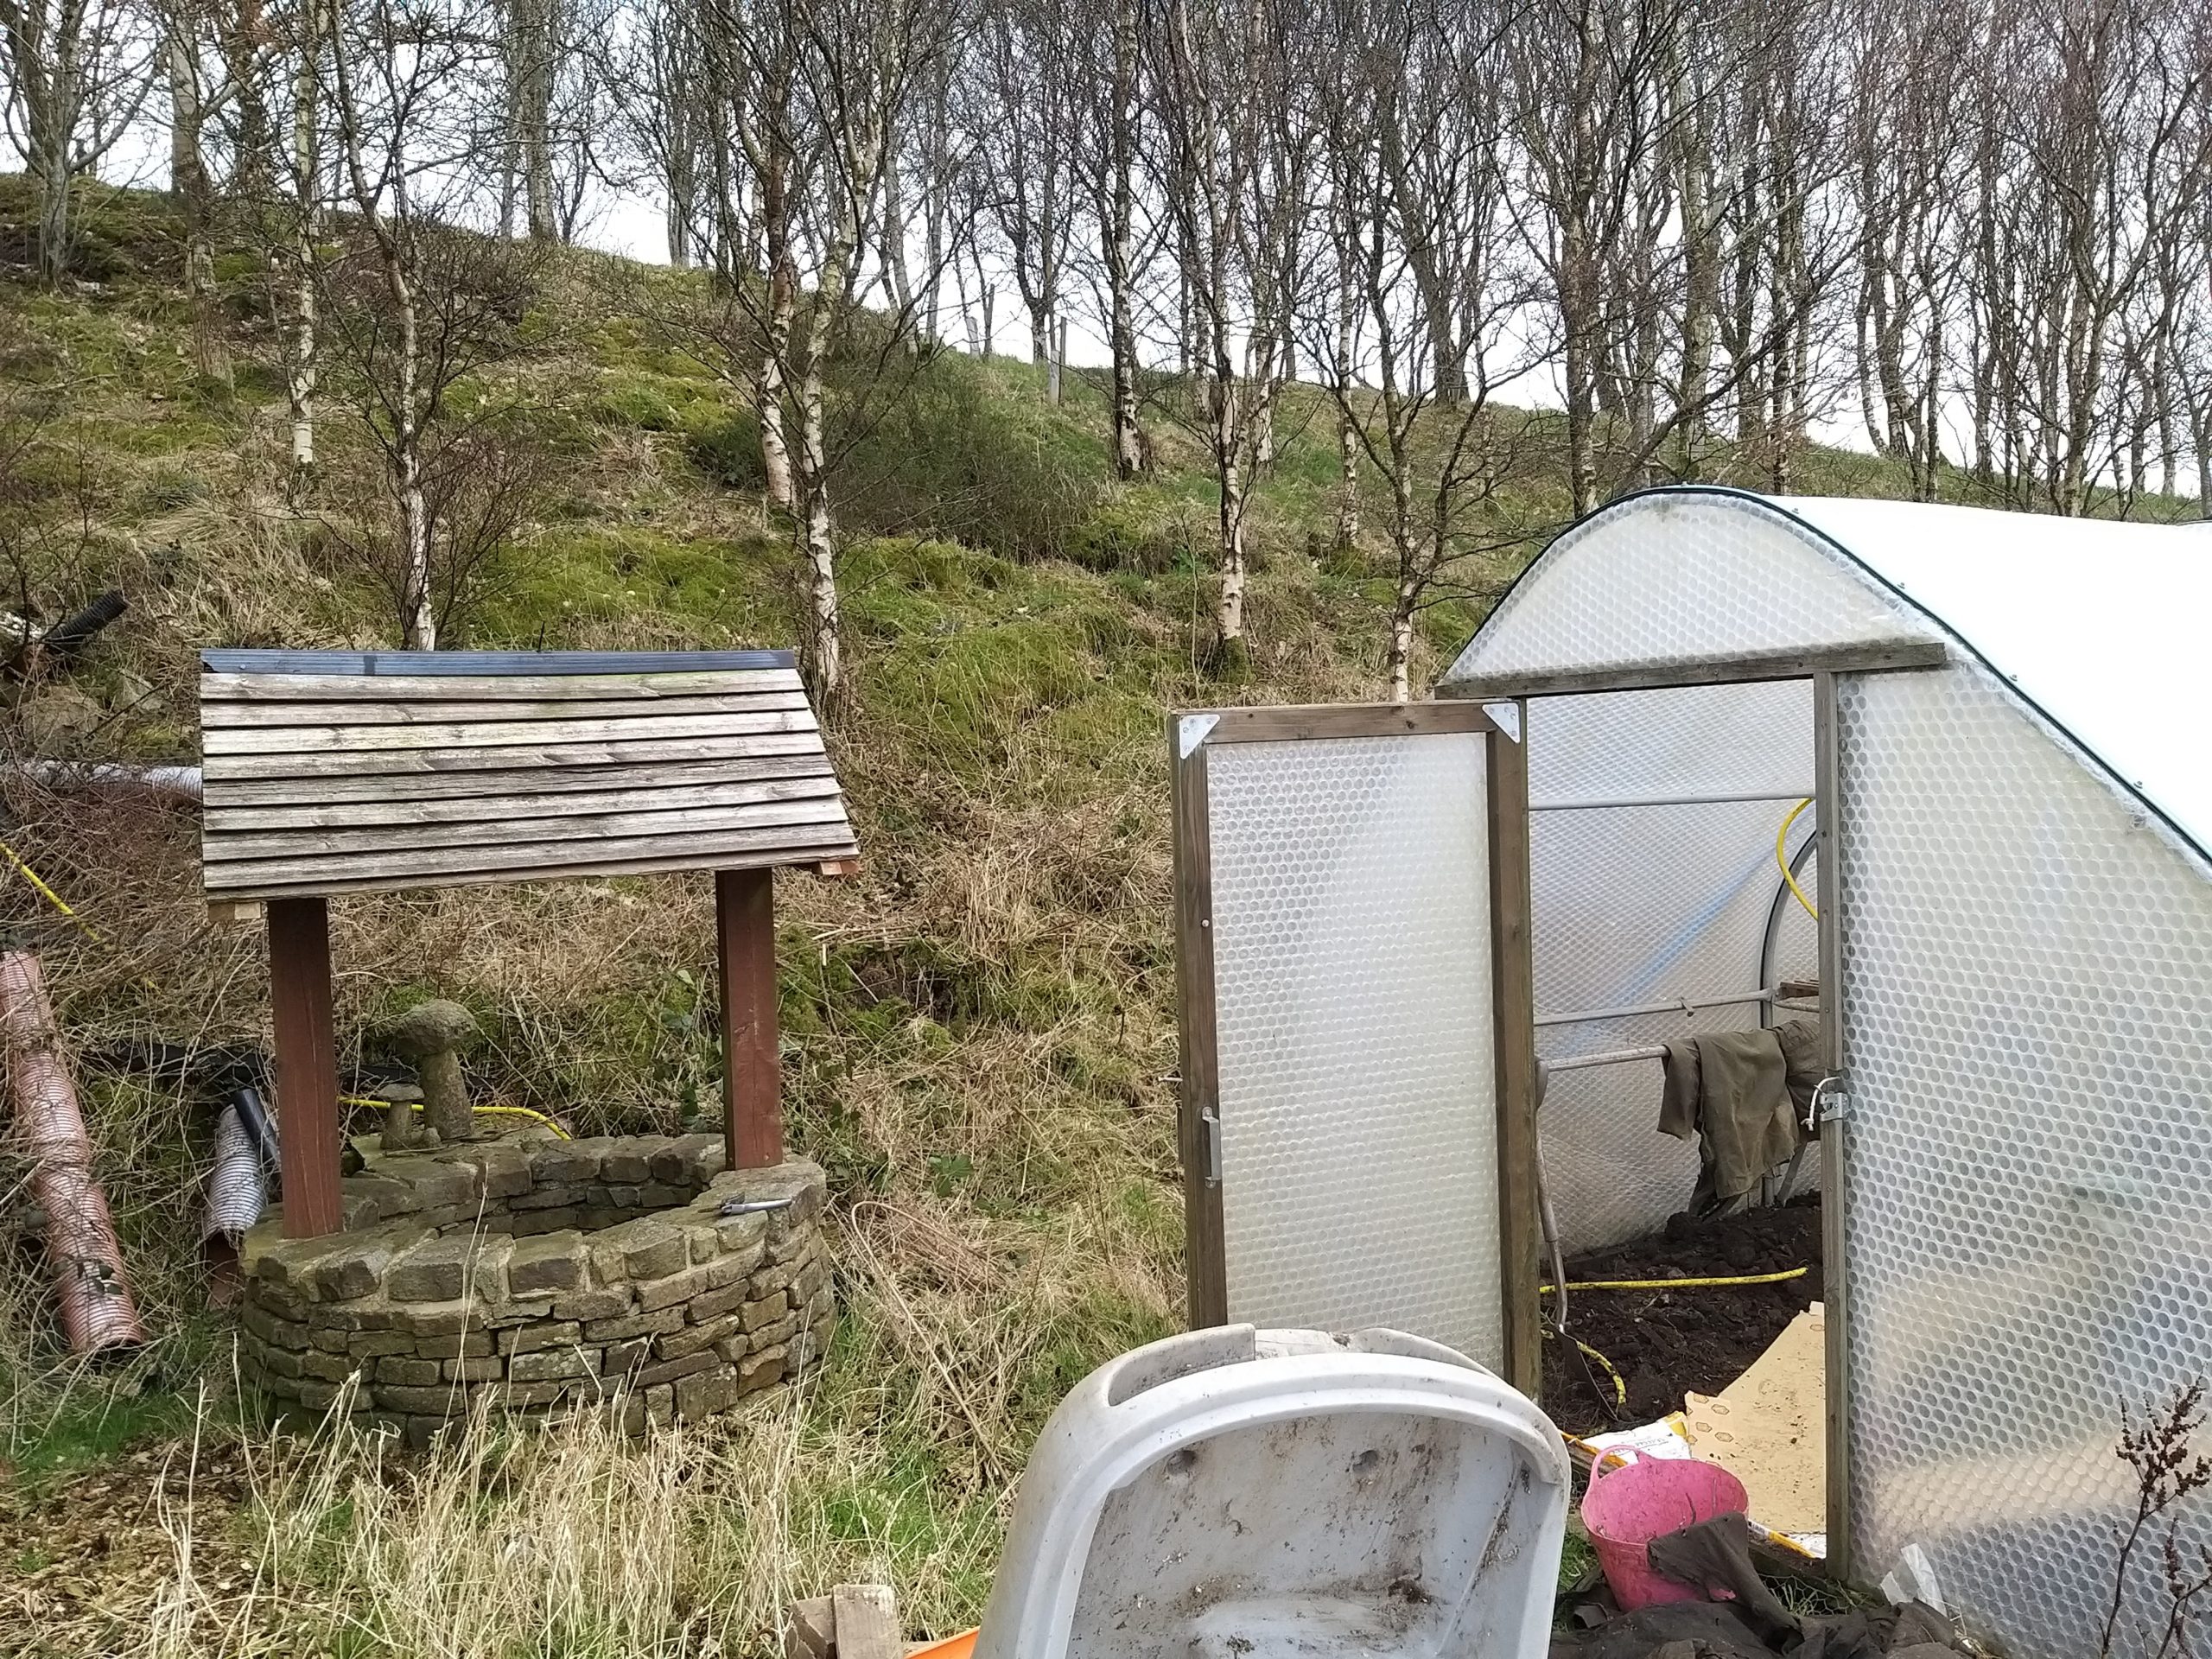
| Water | There is a seasonal drain, built into a ‘wishing well’ by the polytunnel door. There is an IBC above the polytunnel on the banking which collects rainwater from the barn roof. There is a hosepipe leading from the main borehole supply that feeds into the tunnel. Water held on LHS Boundary about 2″ below soil surface Occasionally the polytunnel floods – overflow/force of water from drain (wishing well) | Set up method to collect water from well. Connect IBC to Polytunnel. Plants that like damper soil on Left Hand Side. Keep most plants above ‘flood level’ |
| Access & Circulation (Human & Ventilation) | There is one door in/out of the polytunnel. There is a vent opening on the rear of the polytunnel (top half of centre). There is an automatic side vent on the left hand side roof. The sloping sides restrict ability to stand close to edges. The ground to near the door is untidy and awkward to get a barrow in from driveway. Growing area under staging awkward to get to. Bumped heads. Vents let air and insects in. | Make use of height. Ensure vents are not blocked. Improve area immediately outside polytunnel |
| Vegetation & Wildlife | Some weed seeds will remain in soil despite chicken’s efforts There are plenty of spiders and a couple of ants nests. Chickens have eaten many slugs and worms, but they will return! Many self-seeded heartsease plants have sprung up. Family have been unsure of which plants are which Lemon Verbena Plant near door has survived Fig tree in a pot – roots scratched by chickens, but it has survived | Tolerate the ants – they might be good pest controllers. Encourage the spiders Reduce slug habitat or encourage slug eaters (beetles, frogs, toads) Pond? Clearly label plants More Perennial plants Encourage overwintering of beneficial insects “Grow Your Own Pest Control” |
| Microclimate | Front left hand side is shaded and moist. Right hand side is sunniest. ground closest top polytunnel sides receives moisture from condensation. Polytunnel offers a protected growing environment | Don’t block the sun with tall plants on right. Make use of damp shady spot. |
| Buildings & Infrastructure | Hose pipe carries water from tap in barn to the polytunnel. Polytunnel has sturdy metal poles in its construction There are 2 sections of removable staging on left hand side. | Make use of rain and drain water Make use of the solid frame |
| Zones of Use | Staging for potting and seedlings – near entrance Path way creates circular route through tunnel Historically no zoning | Integrate Polytunnel into landscaping Frequently used and scented plants nearest door Keep one set of staging in full time. |
| Soil Fertility & Management | Plenty of chicken poo Soil has been regularly mulched with compost and rotted horse manure | Maintain yearly mulching with compost. Seasonal compost teas |
| Aesthetics | Polytunnel dwarfed by barn, looks a bit unloved from the outside. | I want to smile when I pick my crops and work in here. Tidy up external appearance |
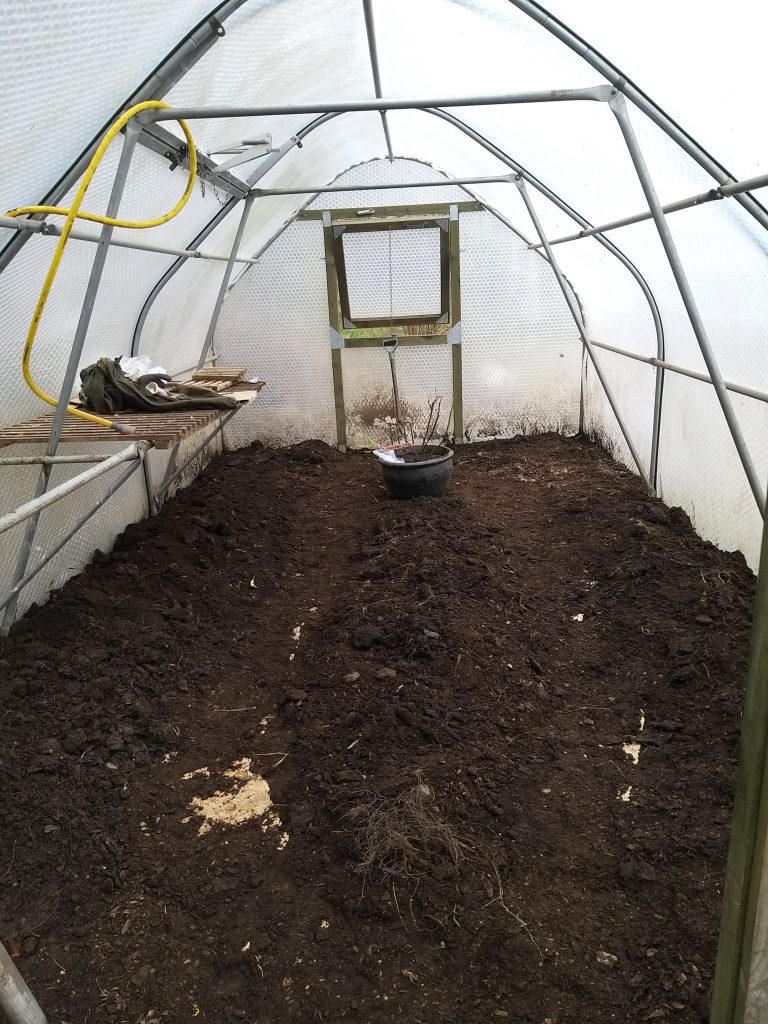
4 – Obtain a Yield

Whilst deciding what I wanted from my polytunnel in the long term, I also needed some crops to grow in the mean time and to understand how the space worked.
I sowed seeds I already had and over the growing season observed how different plants worked in the space.
I observed:
- Salads grew well in the damp shadier areas.
- Tomatoes grew, but didn’t ripen as well as in the greenhouse
- Courgettes went rampant, producing massive plants but very little fruit
- Leafy herbs (chervil, parsley, coriander, dill etc) grew well in the sunny area. Parsley also grew well in the damp shade.
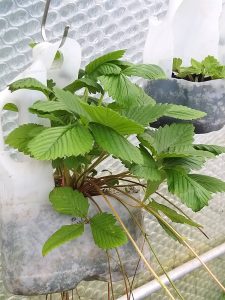
- I trialled growing strawberries in recycled milk cartons (of various sizes). I didn’t get any fruit, but they produced masses of runners which have been harvested.
- Florence fennel was a waste of space and didn’t grow well at all
- Squash grew well, but took up far too much space for the yield produced.
- There were signs of rodents entering the tunnel, but no obvious damage
- I temporarily housed a cherry tree
These observations will inform the future choice of crops.
- I will grow tomatoes in the greenhouse only
- Strawberries need compost with more body (the peat free compost I used was a bit rubbish), or larger pots. Hanging was a good use of space. The milk cartons turned brittle – not photo-stable.
- Courgettes and squash are not a productive use of space and will be grown outside only (or in pots near the tunnel)
- Salads can be kept to the moist shady area – investigate more unusual salad varieties. My kids don’t like spicy salad leaves, so these will be kept to a minimum (though they did like mizuna cooked)
- Herbs can be kept near door on the sunny side
- Plants grown down the centre need to not be too bushy/wide growing
- Investigate plants that may deter rodents, but these holes could provide access for frogs and toads
- The cherry tree isn’t self fertile and needs to be moved, it is also the wrong ‘shape’. I need a tree that can be trained.
5 – Use and Value Diversity

Before launching into this design. I wanted to make sure I really thought about my options, rather than going with what was obvious, or expected.
I made a wish list of what I wanted and then came up with a list of ideas of what could fulfil this wish list. I also wanted to think beyond the obvious so I used Random Assembly to come up with some potential new angles to consider.
| Wish List | List of ideas to meet this |
|---|---|
| Year round crops | Perennial Veg Fruit Trees Fruit Bushes Annual crops |
| Extra Protection for Tender Plants | Cloches Hot Bed |
| Keep nettles and undergrowth away from polytunnel to maximise light and minimise pests | Sheet Mulch Dig up nettles Keep strimming |
| Access to Water | Bucket in Well Hose from IBC Irrigation system/leaky hose |
| Keep most plants above ‘flood level’ | Heaped Beds Pots Hanging Plants |
| Make use of height & Frame | Hanging Planters/Shelves Climbers/Tall Plants Staging Use frame as plant support |
| Improve area immediately outside polytunnel | Flowers Weed suppression/sheet mulch Landscaping Pots |
| Encourage natural Pest Controllers and overwintering of beneficial insects | Pond Companion Plants Mini-Beasts Bug hotels / habitat piles |
| Make plants identifiable to others (label system) | Metal labels Map of crops Reusable plastic labels Wooden labels |
| Maximise sunlight | Low Plants Placement of tall plants Landscaping outside tunnel Reflective surfaces |
| Build Soil Fertility | Mulch Compost Occasional chicken visit |
Random Assembly exercise
Task 1:
List of elements that I either already had or that I had identified.
I listed: 1.Flowers; 2. Cloches; 3. Potting Area; 4. Label System; 5. Mini-Beasts; 6. Fig Tree; 7. Paths; 8. Pond; 9. Climbers; 10. Wishing Well; 11. Staging; 12. Nettles; 13. Herbs; 14. Framework; 15. Perennial Veg; 16. Fruit Plants; 17. Pots; 18. Hose; 19. Annual Veg; 20. Seed Trays
Task 2:
Draw up a list of potential positions and numbered them.
1. On top of; 2. Under; 3. Inside; 4. Outside; 5. Next to; 6. Stuck to; 7. In front of; 8. Behind
Task 3:
I then used an online random number generator (www.pickerwheel.com) to select the first element, a position and the second element.
The results were as follows:
| 5. Minibeasts | Stuck To | 11. Staging |
| 4. Label System | Under | 1. Flowers |
| 10. Wishing Well | In Front Of | 7. Paths |
| 16. Fruit Plants | Under | 15. Perennial Veg |
| 3. Potting Area | In Front Of | 2. Cloches |
| 12. Nettles/weeds | Inside | 17. Pots |
| 18. Hose | Stuck To | 14. Framework |
| 13. Herbs | In Front Of | 6. Fig Tree |
| 8. Pond | Outside | 20. Seed Trays |
| 9. Climbers | Next To | 19. Annual Veg |
Using the above results as a launching point I came up with the following ideas to potentially take forwards.
- Create hanging bug hotels for overwintering ladybirds etc. These can hang from the staging, and won’t get in the way of any plants
- Stems are under flowers, as are bulbs or pots. Split sticks (Hazel) and use as plant labels. Use small Terracotta pots as plant markers.
- Install paths and improve area around wishing well.
- Create guild with fruit plant and perennial veg, perhaps flip this and have the veg under the fruit plants.
- Nettles inside pots – reverse this and use long troughs around outside of polytunnel to supress nettles and add extra growing space.
- Hang the hose on the frame of the polytunnel
- Plant low growing herbs around the fig tree. Position fig behind herbs at front of polytunnel
- Climbers next to annual veg. The two could grow together in the right position.
- Pond outside seed trays sparked the idea of installing a small micro-pond
- Potting area in front of cloches didn’t spark any ideas
6 – Pattern to detail
I cut out shapes representing the eventual size of the element/plant types and then placed them on a plan of the polytunnel to see what would fit in and where. It enabled me to place plants that like particular aspects in the correct space. E.g. Under the staging near the door can be quite shady and wet, and would suit shade and moisture loving plants and a micro-pond.
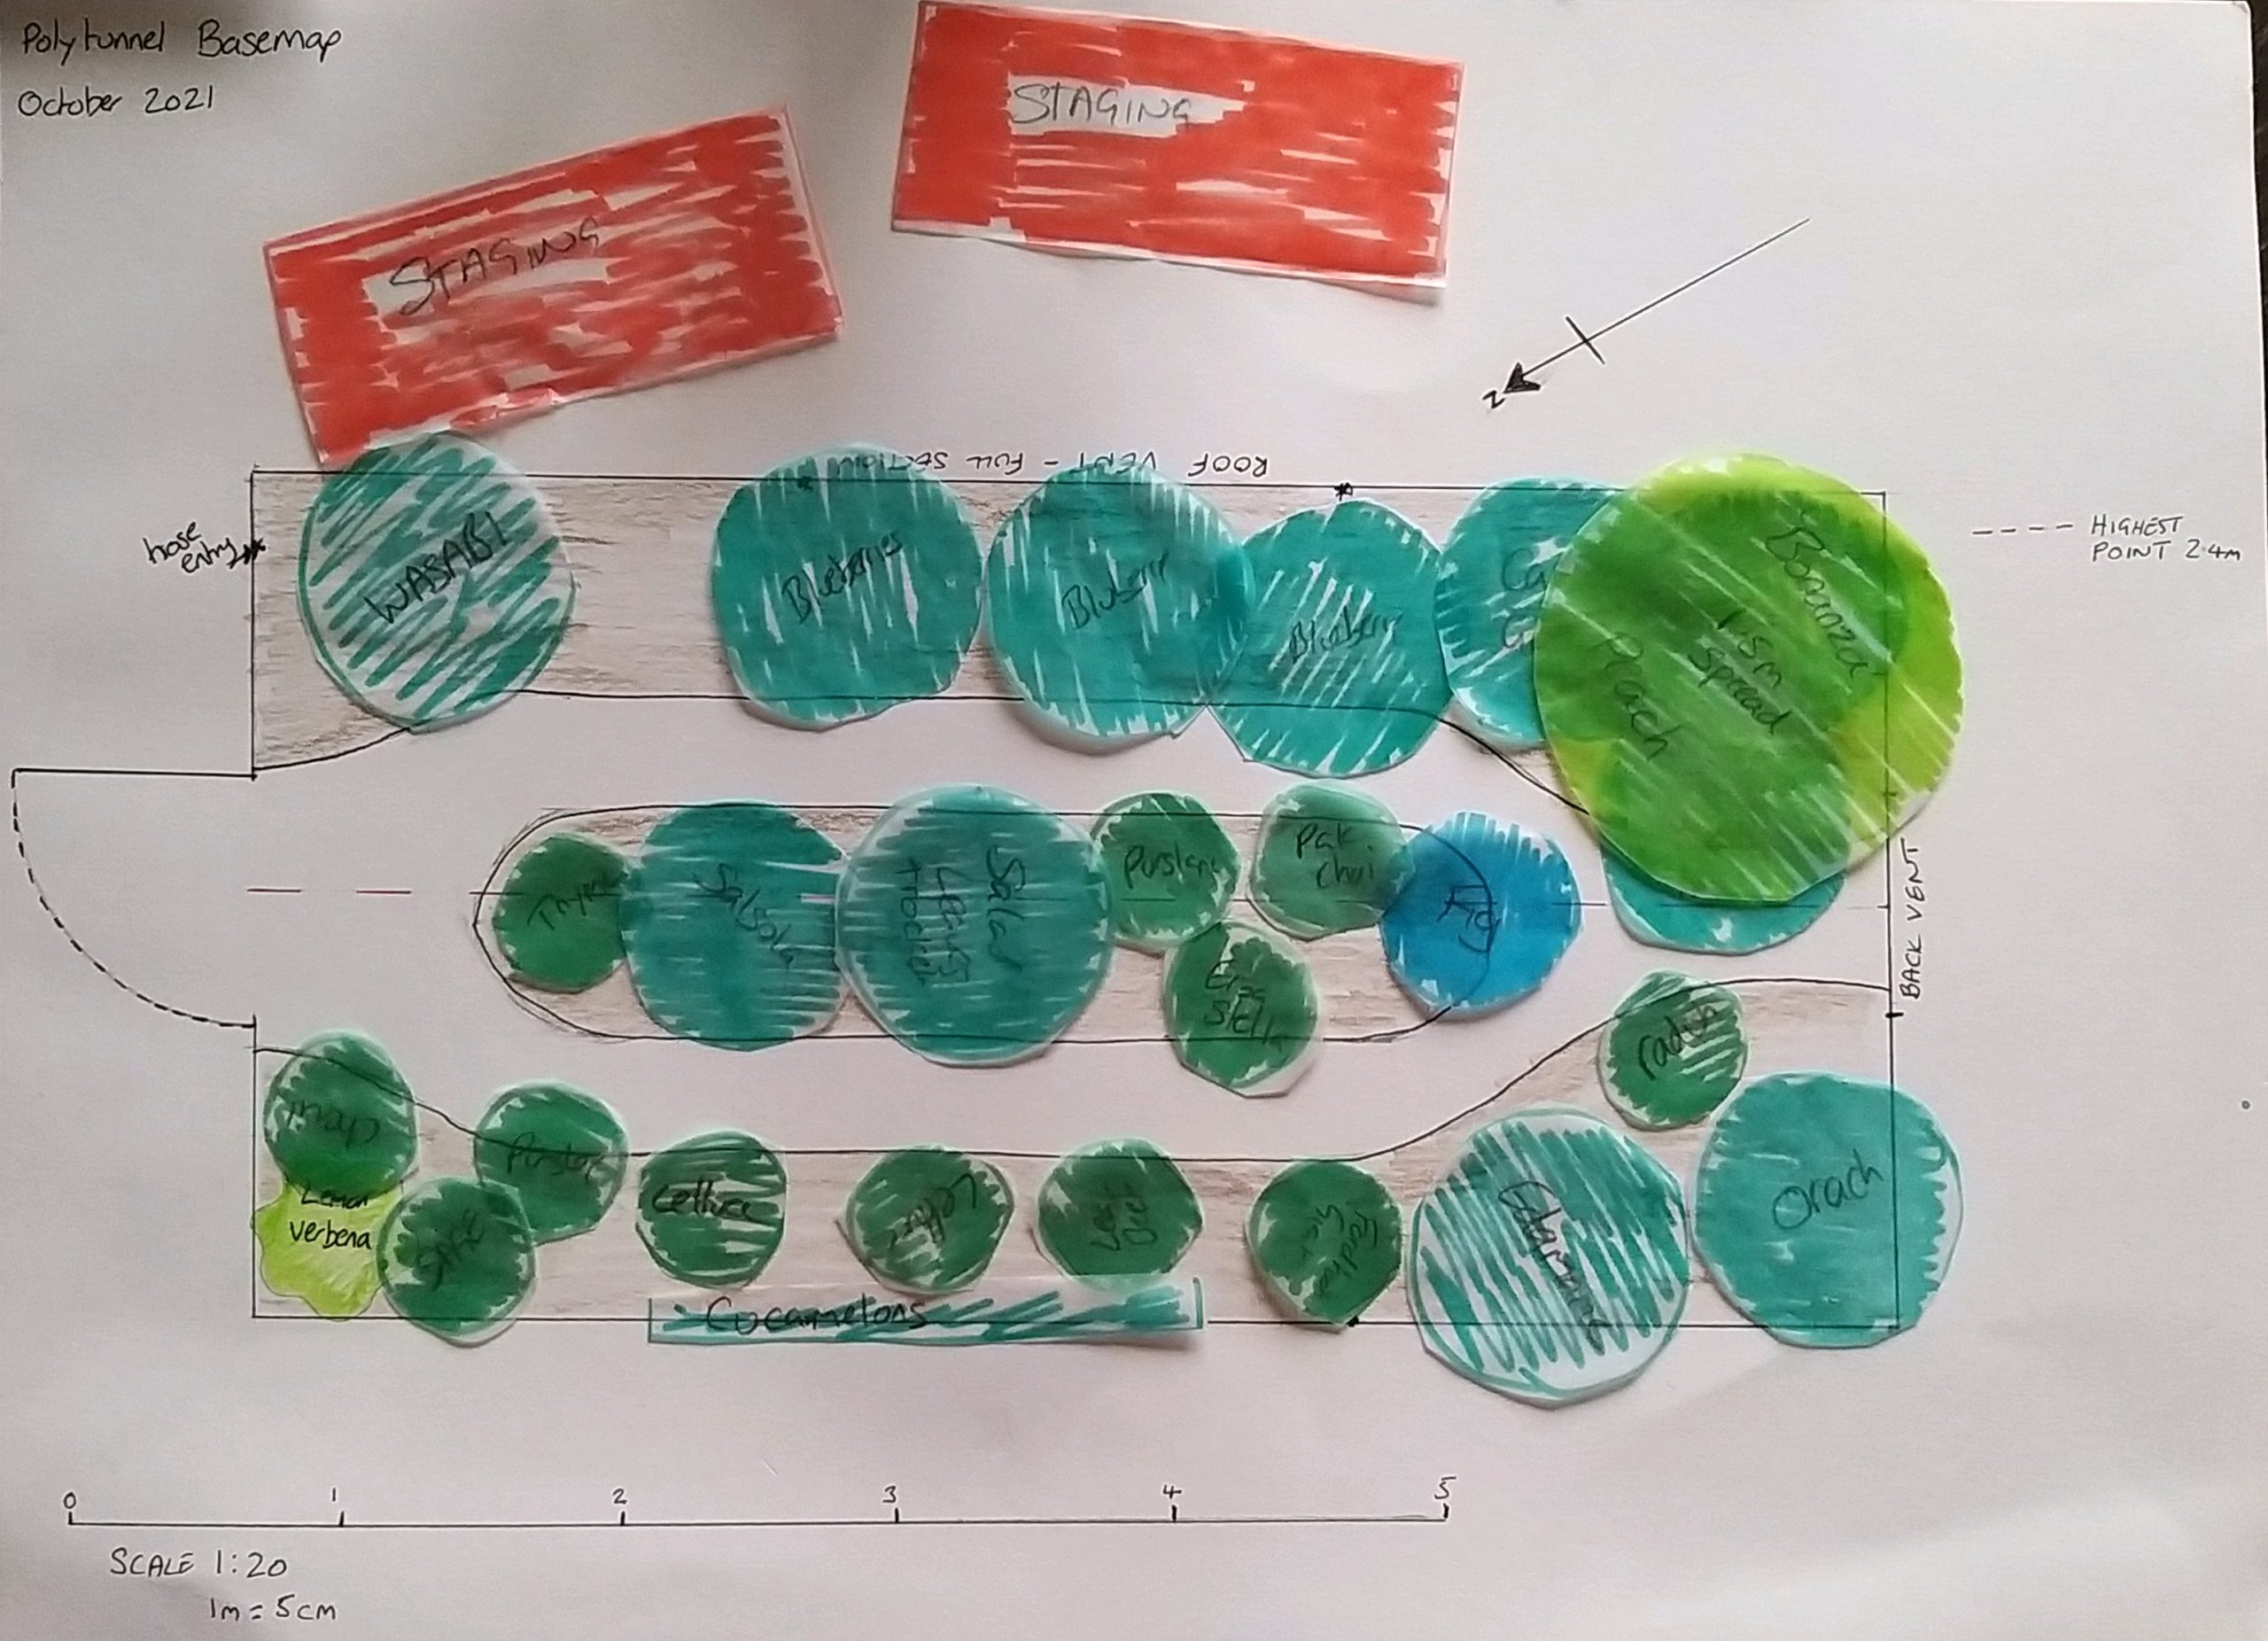
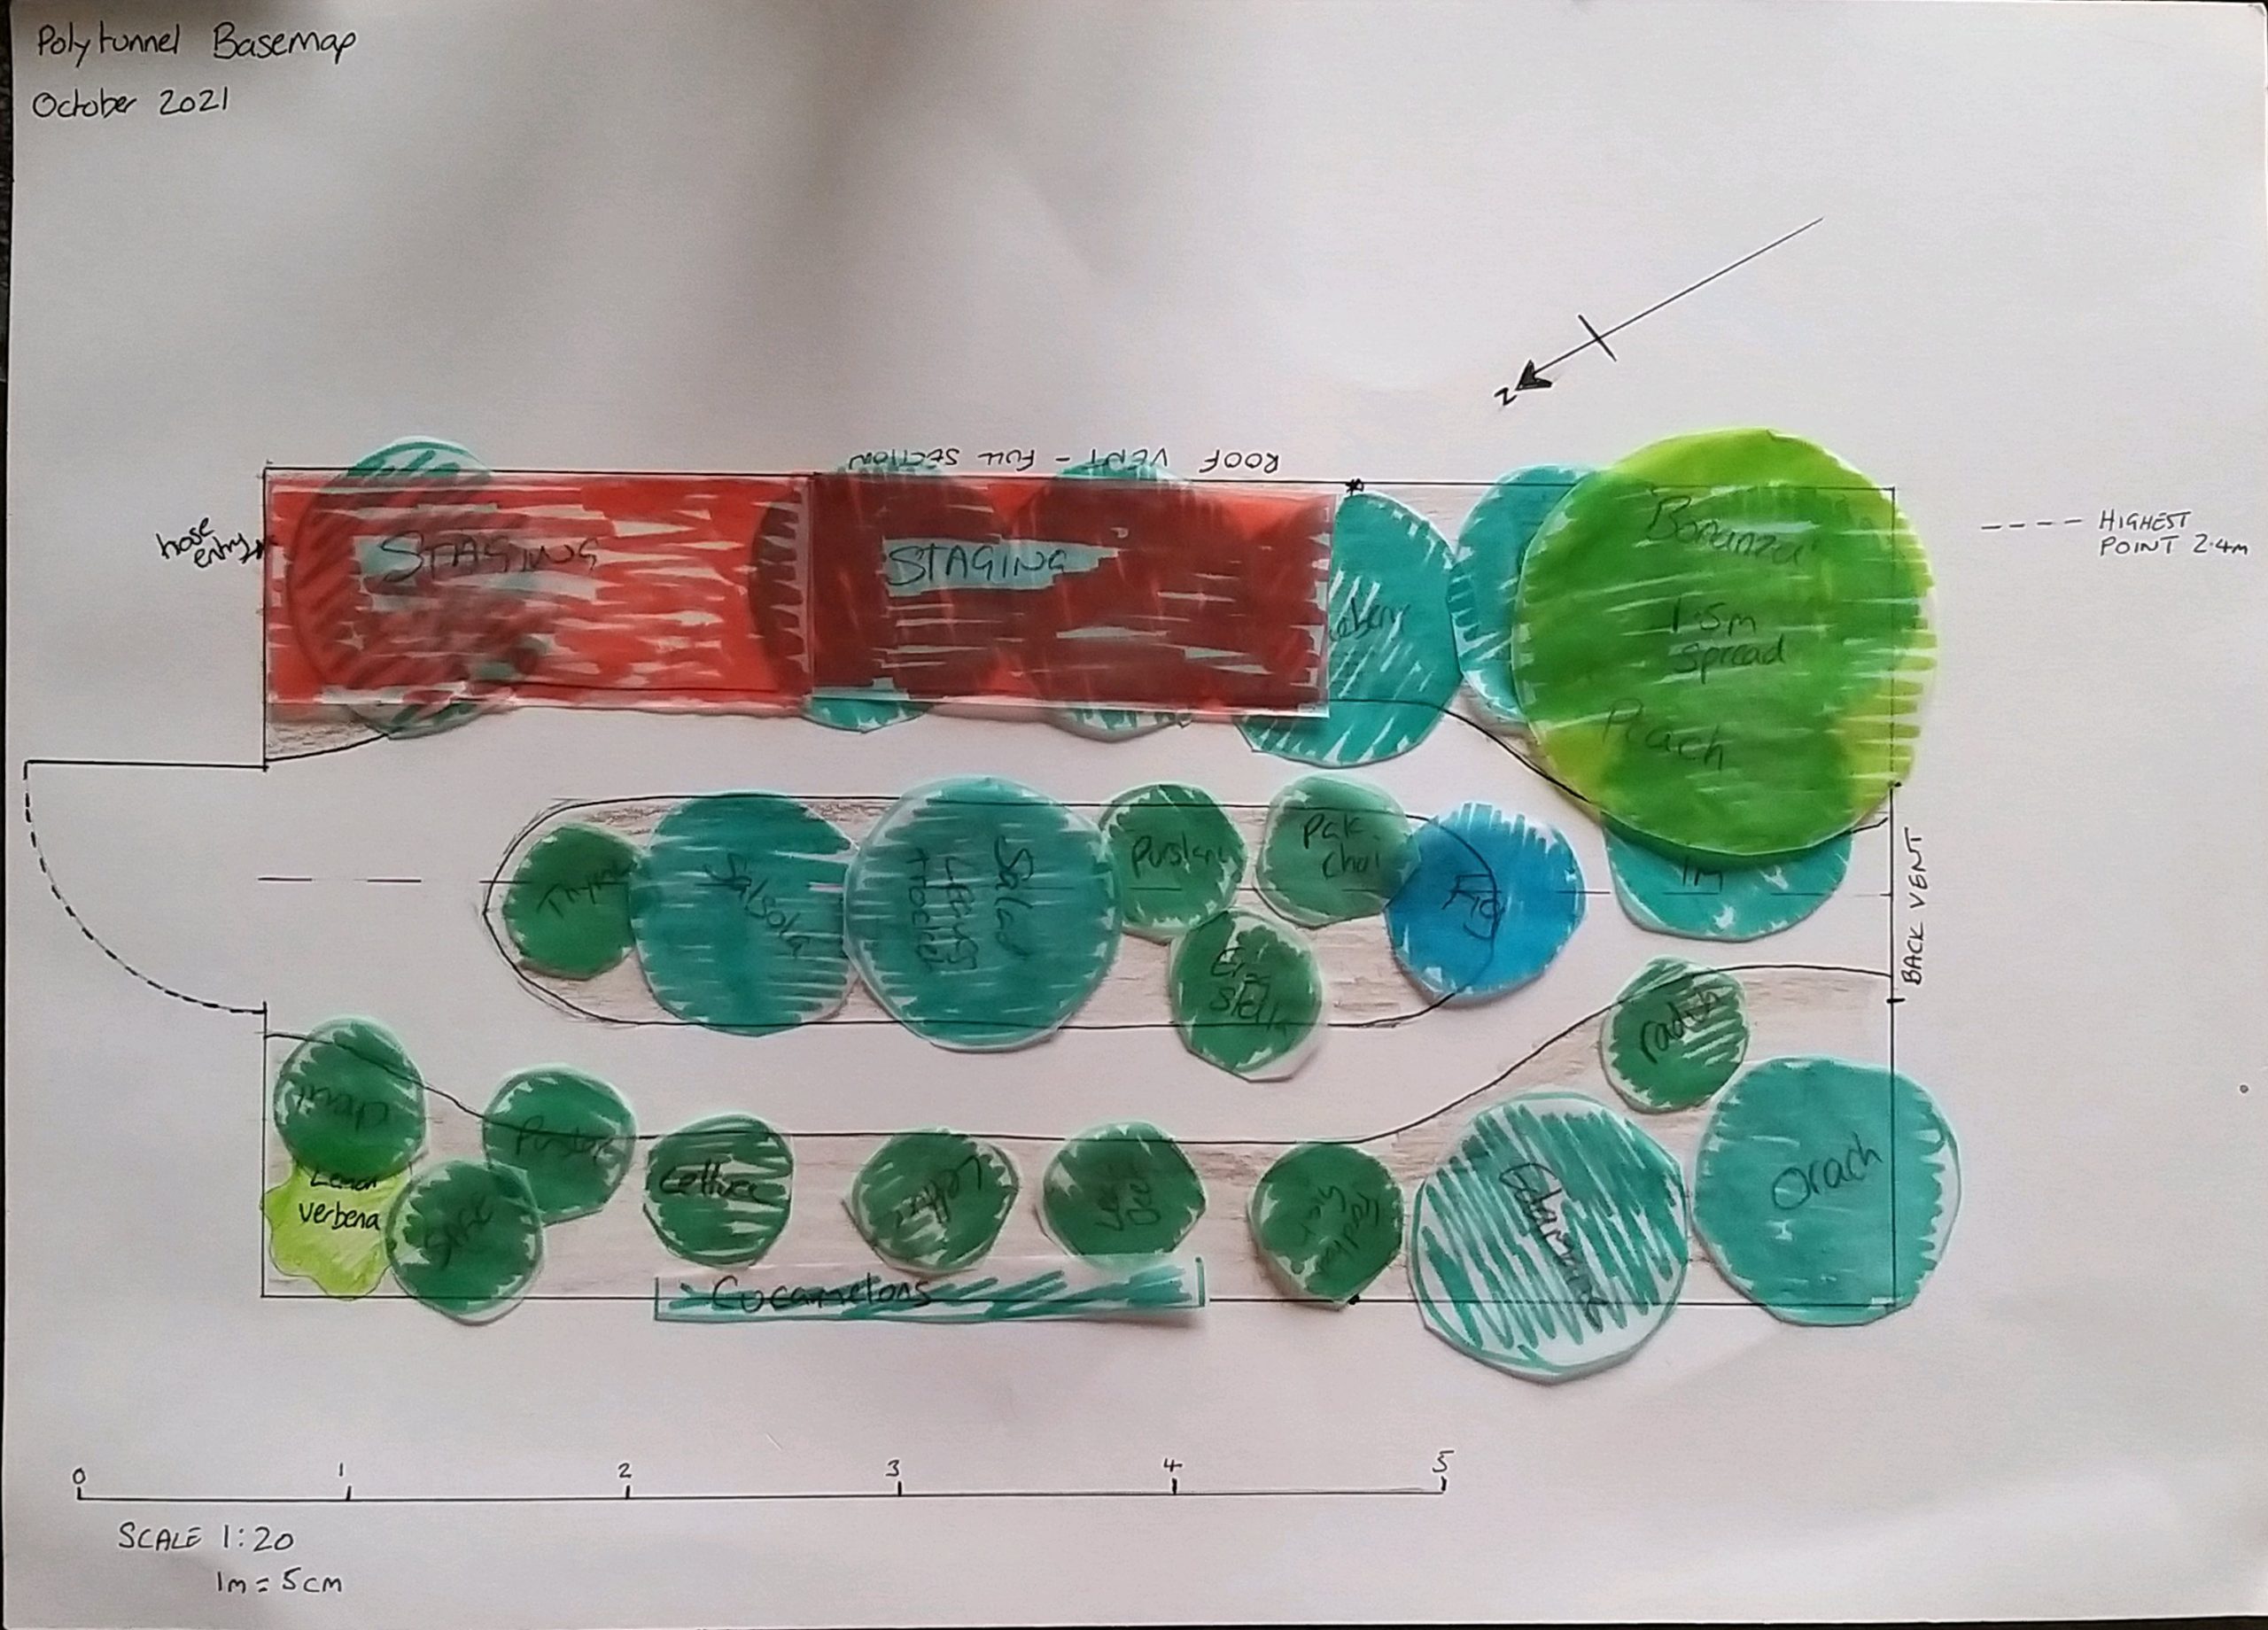
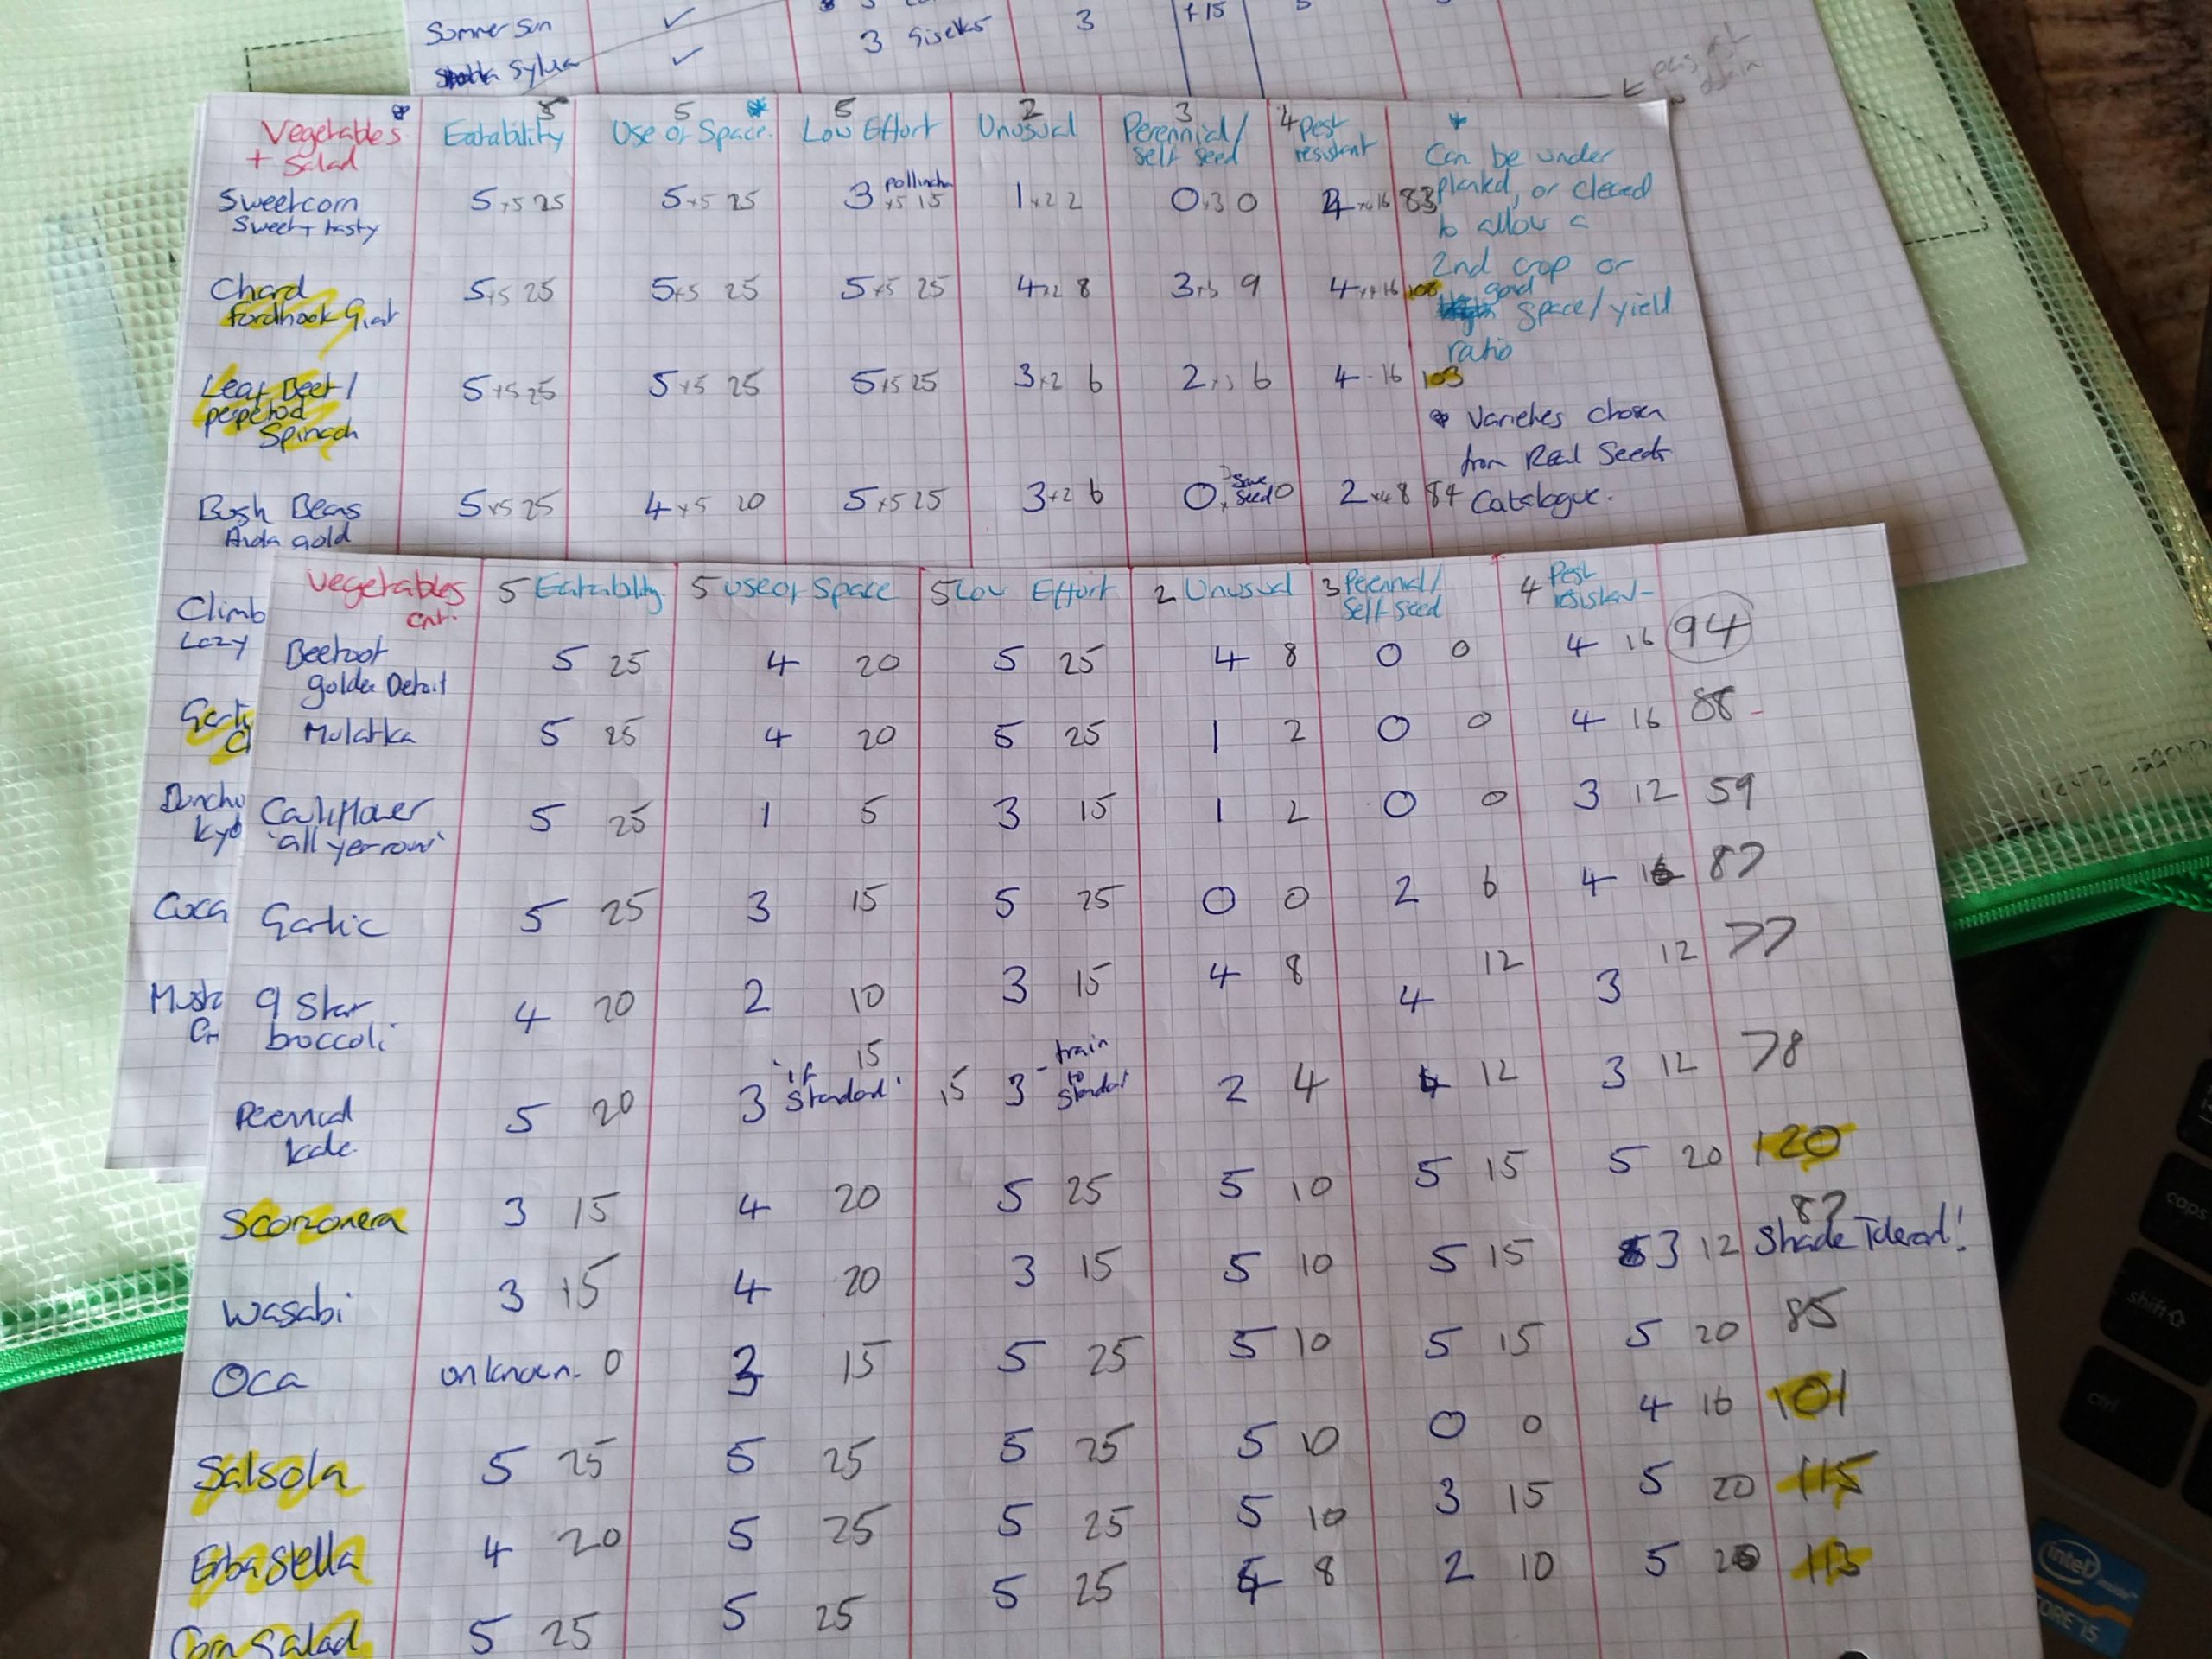
To help me decide what plants to grow in my polytunnel I used a decision matrix. This gave weighted scores to each criteria – 1 being low and 5 being high.
I decided what type of plants and I wanted to grow, and what criterea they needed to fulfil.
I wanted a fruit tree, fruit bushes, vegetables and herbs.
The criteria for the fruit trees were: self fertile(5), naturally dwarfing(5), trainable(3), cost(2), hardiness(4) and taste
The criteria for the fruit bushes were: ease of care(5), hardiness(4), eatability(5), yield(4), compactness(3)
The criteria for vegetables and herbs were: eatability(5), use of space(5) (e.g. can it be intercropped), low effort(5), unusual(2), perennial/self seeding(3), pest resistance(4)
Each type of plant or variety of plant I wanted was scored 1-5 in how well they met the criteria. Then this score was multiplied by the weighted criteria. E.g Salsola scored 5 for eatability, and eatability had a weighted score of 5 so this scored 25 for eatability.
The total scores for each plant were added up. The plants with the highest scores were selected.
7 – Integrate rather than segregate

As plants have been selected to be able to be inter cropped, this will enable me to grow many different crops together. e.g. Lower growing salads or root crops can grow amongst the taller plants such as red orach or climbers such as beans.
Edible flowers will be grown to attract pollinators and also to be eaten in salads.
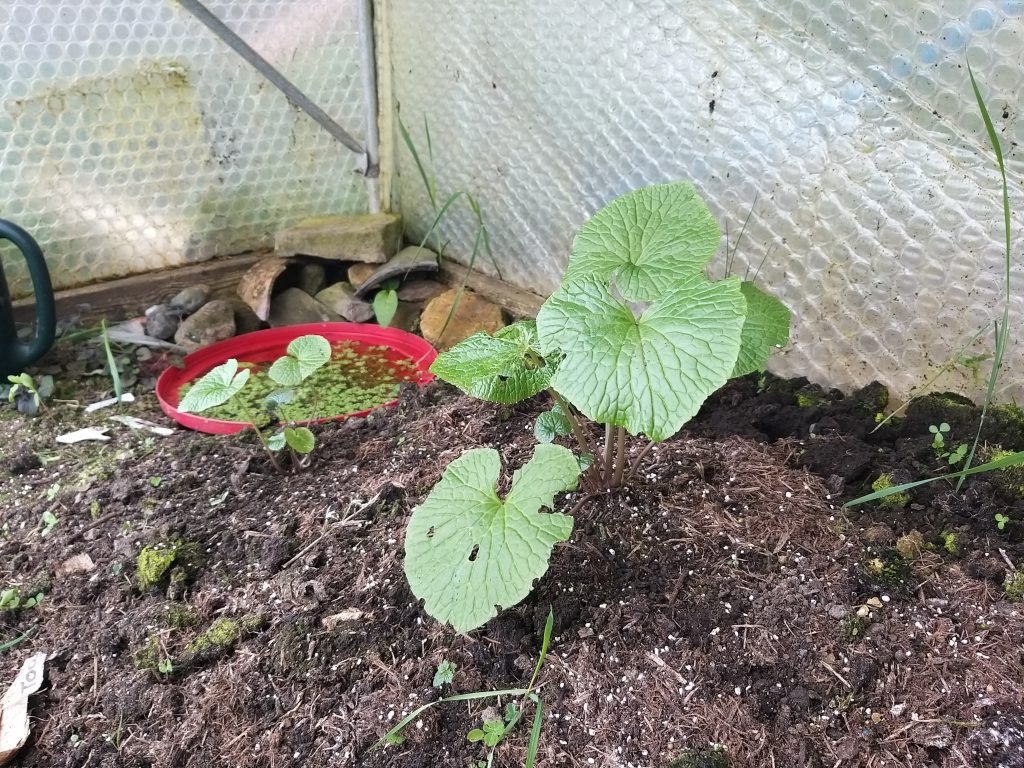
A micro-pond will be placed in the shady wet corner, I will also trial growing wasabi here. The pond should help keep this area humid which wasabi likes. This could become a higher cash value crop if I decide to sell some produce.
I have been gifted some blueberry bushes. I will trial them in the polytunnel, but if they don’t thrive, I have the option to move them elsewhere and reuse the space for other crops.
8 -Use and Value renewable energy and services

The water that I use to water crops in the polytunnel is rainwater collected in an IBC from the barn roof. The IBC is sited on a bank above the polytunnel so gravity feeds the water. I also have a bucket on a rope anc can use water out of the ‘wishing well’ that is just outside the tunel.
Crops will be planted to maximise the sunlight available to them.
9 -Use Small and Slow Solutions

I haven’t launched into planting willy nilly. I spent year one observing how plants grew in the space.
Taking time to carry out a decision matrix meant I didn’t waste money on seeds or plants that I didn’t have space for or won’t eat. There is a huge element of self-regulation here too!
Perennial plants and fruit trees may take time to establish, but will increase soil fertility by building symbiotic relationships with micro-organisms and fungi within the soil.
I’m not afraid to try new things e.g. strawberries in only milk cartons. I learn alot by trying things out. For example the strawberries didn’t do well in the cartons, and the plastic became brittle. These lessons have fed into my planting ideas and this year I am trialling pots on a hanging shelf and strrawberries in a hanging bit of gutter.
10 – Use the edges and value the marginal

Outside the polytunnel – I will plant up some planters with flowers outside the polytunnel along the driveway which will make it look more attractive and attract more polinating insects. They will be a mixture of spring bulbs and summer blooms. There is a lovely wishing well, and to this will be made more inviting and accessible. I have some spare wildflower seeds, so these will be sown here to make it look more attractive and attract pollinators. Many of the plants are perennial so should return year after year.
The entrance to the tunnel will be where the scented and culinary herbs wil be planted. So you get a lovely fragrence when you enter the tunnel, but also, herbs are easy to find for the rest of my family.
Making use of the damp/wet corner, by growing Wasbi and installing a micro-pond. I’m hoping toads will come and make their home in the tunnel and help to control the slugs.
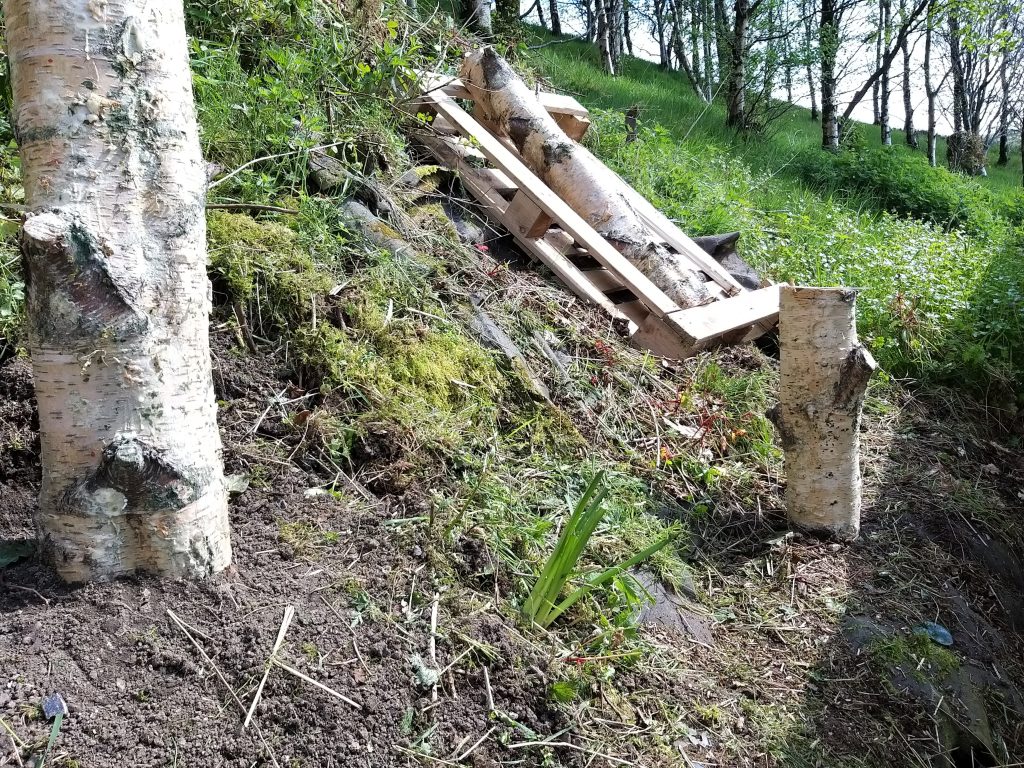
The shady bank behind the tunnel will become home to some innoculated logs to produce a crop of fungi. I am hoping the brambles and the general awkwardness of the space will deter deer from eating them!
11 – Produce No Waste

So far, I have had to use packaged compost as I don’t have enough compost to mulch my beds and to use as ‘seed compost’. I am hoping to be able to create some ‘hot compost’ that will kill off weed seeds so I am self sufficient in seed compost next year. If this isn’t practical, I will investigate other options. I have kept the compost bags to re-use with my own seed compost.
At the end of the season I will carry out a realistic input/output analysis on the design.
12 – Observe and Interact

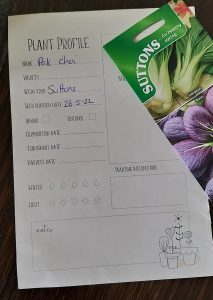
I have started to use a folder system to track sowings & plantings. This will help me to remember what and when I sowed or planted and to record how well they did. The slips have the seed packets attached and will be placed in sealable folders to help keep them organised
I will also keep a photo record along side this. I am enjoying a slow and unhurried implementation. Each visit to the tunnel is different. Sometimes there are many weeds, sometimes a lot of self seeded plants, but before I tackle anything, I wait, and think; Where have the weeds come from? – Many are clover seedlings from the composted cow poo (which are a good think, I how and the nitrogen fixing roots continue to do their thing). Can I pot on or use the seedlings elsewhere? Would any friends like some? How much Chervil do I actually need (it is my favourite herb, so I use it a lot – I call it posh parsley). Jobs not done yet, are acknowleged as further chances for observations.
13 – Apply self regulation and accept feedback

I used four questions to evaluate the design:
- What went well?
- Throughout the initial observation year I experimented with different crops and growing methods. These have fed into the final design.
- Designing using these principles felt like a really natural way to make decisions. I didn’t feel like I was trying to shoehorn a decision into a principle or vice-versa. They acted like reminders to think about decisions in a more holistic way.
- Using a decision matrix helped me to not launch headlong into purchasing things I may not need, might not eat or might not grow.
- Designing using these principles felt like a really natural way to make decisions. I didn’t feel like I was trying to shoehorn a decision into a principle or vice-versa. They acted like reminders to think about decisions in a more holistic way.
- What was challenging?
- calculating how much to sow and when – hopefully my records will help in years to come
- feeling diseartened when I didn’t manage to be as effective at intercropping and succession olanting as I wanted to be – but this is a useful observation and we can only learn from mistakes
- What was the vision, was it met or did it change?
- The vision was to have a beautiful polytunnel that supplied me with fresh produce and happiness all year round. The vision will be met, I definately smile when I enter the tunnel. My peach tree makes me particularly happy, as does snaffling strawberries. I don’t think any have made itr past the door yet (oops).
- What are the next (achievable) steps?
- I will review the design every winter to see if any changes need to be made. The harvest and growing records will help feed into this
- Did the way I recorded sowings and successes (or failures) work? This will also be reviewed at the end of the season.
- Continue to improve the area surropunding the polytunnel to make it more inviting
Reflections
Ethics
At the outset of a design I always consider how Ethics and will be integrated into the design, but at particular points in this design I considered them more fully. Earth Care was at the forefront of my mind everytime I bought a bag of compost…raising the question of how to make enough seed compost in future. I resued plastic plant labels, and considered other non-plastic alternatives. Using painted hazel sticks and small terracotta pots on sticks will be my preferred choice going forwards, but I will continue to take care of, and reuse my plastic labels – they are great for using in seed trays!
People care – I want my polytunnel to look attractive and the area around it welcoming. I am working on making our driveway and the area around the tunnel/barn more welcoming. I’ve also started to give away excess seedings to friends, neighbours and passers by
Future care – by recording planting successes and failures, that knowledge will be available for years to come and I’ll be able to pass on information to others. Seeds and seedlings have been shared with friends and neighbours, and also used on a community garden project I am involved with.
The process
I sometimes feel like I have to shoehorn what I am doing into a ‘design method’. This design was really natural. I took into account my usual gung-ho approach to planting and sowing seeds, and found effective ways to manage this using the very organised matrix approach. I am not rushing the implementation, I am going slowly, and enjoying watching the space develop.
Tools used
Desire Lines – a no brainer, go with the flow…if things move in a certain way naturally, use it, don’t block it (unless it is causing harm).
Scale of Permanence – Using the scale of permanence as a tool to consider the site and identify what was there and what was needed to achieve the desired outcome was something I’d not done before. It was really effective, making me consider all aspects of the site – the ultimate pattern to detail tool! The Sca;e of Permanence tool lead me neatly into a list of needs and characherists that then linked to a list of elements that I could use for the Random Assembly.
Random Assembly – is great fun, I can imagine that the more elements and connections you have, the more ‘out there’ the ideas could become. This would be a great tool to use in a pub when designing with a group of people! I came up with some great ideas, some of which have been implemented (e.g. hose on the frame, micropond and bug hotels), and some are still on my ‘to do’ list. In future I would consider using this to create plant guilds.
Decison Matrix – this was a game changer. Giving myself a framework to carefully consider what to plant was liberating. I am a great procrastinator, and will spend hours pouring over plants and seed choices. This made me use these procrastination ‘skills’ and put them to good use. Having weighted scores meant that choics were made clear.
Sowing Logs – Having a way of tracking what was planted, and its success is something I’ve never quite got round to. I’ve always been a ‘its got two chances’ type of grower. I am looking forward to seeing how this works for me.
Evaluation agains intended yields identified at the beginning of this design:
- A diploma design – Yes, Number 5, half way there!
- A new framework to play with – I loved using the principles as a web, it felt natural and unforced.
- Year round harvest -time will tell, but in March I was eating last years leaves and herbs, and in May, I was I was eating salads planted this season – there are baby peaches on the tree too!
- A better use of my polytunnel space – so far so good, the paths work well, and cucamelons are finding their way up the metal frame
- Tie in my learning to practical designs for the farm – yes, my polytunnel is better utilised.
- Gain practical skills – I constructed a hanging planter and shelf, have become more organised in my sowing and planting and learned to innoculate mushroom logs
- Become fluent in the use and application of design tools and Permaculture principles – I become more ‘fluent’ with each design and learn to become less hung up on ‘doing it right’.
- Become confident enough to demonstrate and explain to others how Permaculture can be applied to both land non-land based projects – my confidence grows with each design.